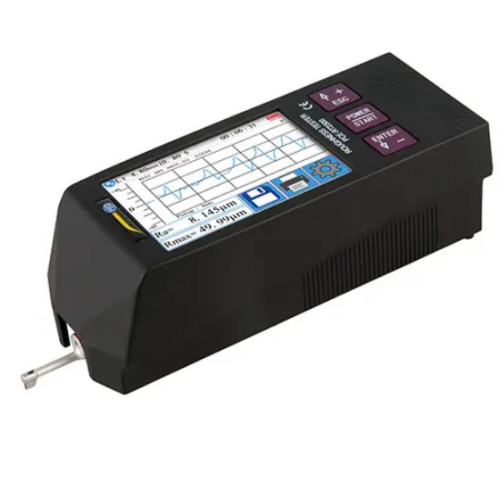
Surface Testing - Roughness Tester PCE-RT 2300 in Pakistan
- Brand: PCE Instruments Germany
- Product Code: PCE-RT 2300
- Availability: Pre-Order
-
Rs.0
SURFACE ROUGHNESS TESTER IN PAKISTAN PCE-RT 2300
Portable material tester for the rapid detection of roughness (Ra, Rz, Rq, Rt, and many more) / Detachable motor unit / Touch screen Interface / 320 μm or 12.6 mil range.
The surface testing - roughness tester PCE-RT 2300 is used to measure the roughness of surfaces. The PCE-RT 2300 roughness meter has a removable motorized sensor. This property makes it possible to determine the surface roughness with the roughness tester even on small or narrow profiles. The measured values are displayed on a large LCD display of the roughness tester. This display is also used by the roughness tester. The roughness tester is powered by an internal battery with voltage. This battery can be powered by a conventional USB power adapter.
The detachable motorized sensor is connected by a cable to the main unit of the roughness gauge. The diamond stylus is installed in the motorized sensor. This presses with a maximum force of 4 mN on the surface from which the roughness is to be measured. The roughness tester measures according to the valid ISO, ANSI and JIS standards for roughness measuring instruments.
Specification:
| Measuring range | Rz: 0.02 μm ... 320 μm; Ra, Rq: 0.005 μm ... 32 μm, Rz = 320µm (-160µm~160µm) / 12600μin (-6300μin~+6300μin) |
| Accuracy | ± 10% |
| Repeatability | ± 6% |
| Resolution | ± 20 μm: 0.01 μm ± 40 μm: 0.02 μm ± 80 μm: 0.04 μm |
| Measurement Parameters | Ra, Rz, Rq, Rt, Rc, Rp, Rv, R3z, R3y, Rz (JIS), Ry, Rs, Rsk, Rku, Rmax, Rsm, Rmr, RPc, Rk, Rpk, Rvk, Mr1, Mr2 |
| Measurement Standards | ISO4287, ANSI b46.1, DIN4768, JISb601 |
| Graphic | Primary profile (roughness + waviness) Roughness profile (roughness) Loading curves |
| Measuring filter | RC, PC-RC, Gaus, DP |
| Measuring section (Cut Off) | 0.25 mm, 0.8 mm, 2.5 mm |
| Measuring length | 1 ... 5* measuring path Max. 17.5 mm (including pre- and post-run) |
| Sensor | Diamond probe tip 90° cone angle 5 μm |
| Contact force sensor | <4 mN |
| Feed rate | 0.25 mm: 0.135 mm / s 0.8 mm: 0.5 mm / s 2.5 mm: 1 mm / s |
| Display | 3.5" LCD screen |
| Power supply | 3.7V Li-Ion Battery 5V / 800-mA USB Power Adapter |
| Operating time | 50 h |
| Operating conditions | -20 ... 40°C / -4 ... 104°F, max. 90% rh |
| Storage conditions | -40 ... 60°C / -40 ... 140°F, max. 90% rh |
| Dimensions | Main unit: 158 x 55 x 52 mm / 6.2 x 2.2 x 2 in Motor unit: 115 x 23 x 27 mm / 4.5 x 1 x 1.1 in |
| Weight | About 500 g / 1.1 lbs |
Delivery Scope:
1 x Surface testing - roughness tester PCE-RT 2300
1 x Microprobe
1 x Removable motorized sensor
2 x Connection cables for the motor unit
1 x Charger
1 x Interface cable
1 x Transport case
1 x Manual
Download the User Manual of PCE-RT 2300

